| Page 3 of Learn with the Redbridge Marquetry Group |
|
Well, here we are
at last, the practical pages that we hope will help you
to construct your first marquetry picture. We will
assume that you have assembled the materials, tools and
veneers as described on the previous pages and are now
ready to begin. Now, as we are going to be using the
window method for making our picture let me take this
opportunity to explain the advantages of the window
method and the reasons that most marquetarians have
adopted its use almost universally these days. The main
reasons are accuracy and control. The accuracy comes from
the fact that you cut out and remove a piece from your
“waster” veneer (the waster veneer is usually a fairly
cheap and plentiful veneer that is slightly oversized
for your finished picture, and it acts as the “blank
canvas” upon which you place the outline drawing of your
picture and it acts as the building frame from where you
construct your picture. If you select it right you could
make use of the waster veneer as the sky or foreground
of your picture, but quite often the whole of the waster
gets cut away and replaced with your various picture
veneers, hence its name of waster veneer) and by putting
this now "vacant hole" in your waster on top of the
veneer you wish to use in that part of your picture, you
can orientate your waster and picture veneers in
conjunction with each other until you find the ideal
section of the "picture veneer" that will be most
suitable for that part of your picture, then with the
two veneers, the waster on top of the "picture veneer",
you cut your picture veneer’s "potential insert" by
following the edges of the hole (or window) you
previously cut out of your waster using your scalpel.
When you've cut you
"potential insert" from your "picture veneer" check out
it's accuracy by fitting it in the vacant window of your
waster, if it fits nicely without any need for trimming
or adjustments you can now glue it in place. This method
of cutting your veneer "inserts" is as accurate as the
precision with which you can follow the edges of the
window “cut out”. With a little practice you can make
your joins so tight that when you hold the assembled
joins up to a light source you won’t see any light
creeping through. This accuracy is the principle use for
adopting the window method. The other advantage I mentioned
is the incredible control you have with using the window
method. The first and foremost “control” is, as I
mentioned above, the advantages you will experience when
matching your picture veneer selection to the
requirements of the needs of your picture. An explanation
of this is that after cutting your window in the waster
veneer you can orientate the window made in the waster
over the "picture veneer" until you find the ideal part
of the "picture veneer" that will give you the effect
you desire. The window method also allows you to change
or alter any part of your picture you don’t feel happy
with until you achieve your perfect marquetry goal.
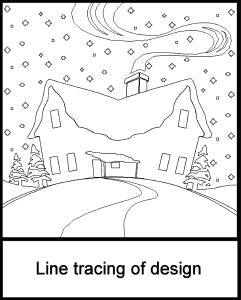
Your first step
is to sort out your picture or design from which you are
going to make your marquetry picture. For this
demonstration I have selected a simple little winter’s
scene I found on some computer clip art. This scene is
ideal as it doesn’t contain too many variations of tonal
ranges and can be assembled from a selection of veneers
that have comfortable cutting qualities. Our next step
is to determine the size that we want the finished
picture to be, for this one I have decided on approx 15
x 10cms (that’s about 6 x 4 inches) so what I now do is
set up the dimensions on my printer dialogue box on my
computer and then print the correctly sized picture out
that will now become my template from which I will be
making my marquetry picture. Now I select a
suitable sheet of veneer to use as my waster, for this I
am using “Sycamore” which is a light coloured easy
cutting veneer. I cut a blank slightly larger than my
design, this will be approx 20 x 15cms (8 x 6 inches)
this will give me plenty of spare ‘land’ around my
design, although you don’t need to be as generous as
this if you prefer not to have such a large waster. The
next step is to align the tracing over the waster veneer
so that the design fits roughly in the middle of the
veneer and then we need to tape the top edge of the
tracing paper to the top edge of the waster veneer and
then once that “hinge” is secure I normally make a small
alignment mark on the lower edge of the tracing paper
and the waster veneer so that I can be sure that
everything lines up when I need it
(a
useful tip here is to make a small cross with your
pencil that goes over the bottom edge of the tracing
paper and onto the veneer so that when you want to
re-align the tracing with the design you previously
transferred on to the veneer you just adjust the tracing
paper and veneer until you’ve reformed the cross and
then you will have perfect alignment).
One important point I
haven’t made yet is that as the design is a snow scene,
and as I’m using sycamore which is a light coloured
veneer for my waster veneer, then I can make use of the
waster veneer to depict the snow in the foreground of my
picture. Because of this fact I’ve orientated my waster
so that the grain pattern flows left to right rather
than top to bottom, this use of the grain flow helps
shape the picture.
For the next page of this
article click the link below. |
||||||||
|
Learn with Redbridge Marquetry Group Page: 1 | 2 | 3 | 4 | 5 | 6 |
||||||||