RMG Shield logo Redbridge Group Header Logo RMG Shield logo
Mounting a picture, affixing stringers, borders and cutting mitres Part II
by David Walker


If a
contact adhesive is used to lay the picture, both the picture and the board must be coated as per instructions on the tin.

Once touch dry, using the markings on the picture and board, position the picture.

Press gently with your fingers so that the picture stays in position then press in the veneer press or flatten down with a wallpaper roller or a similar object.

Fig 10
Fig 11

Once the adhesive has had sufficient time to dry or cure we can now ensure that the border spaces are of equal width.

From the sides and ends measure the width that you require for the borders (Fig 10 & 11). Ensure that the border spaces are the same width around the picture.

Mark, using the set square to ensure accuracy and cut through the picture to the base board
(Fig 12). Carefully using your knife or a chisel, remove any waste.

Once started this comes away quite easily
(Fig 13).

We will now have a picture with the border space of equal width all round and we are ready to prepare the borders and attached stringers to attach to the picture.

Fig 12 Fig 13

Cutting borders and applying stringers

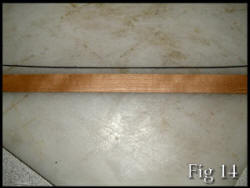
Choose veneer with a straight grain for your borders. (Fig 14) If you choose borders that are equal in width but have grain that is not straight, when mounted it will make the picture seem out of square.

Choose stringers that are of the same width. (Fig 14) Often stringers, even from the same batch may vary.
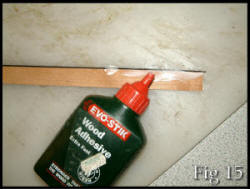
Cut the borders slightly longer and wider than required. Attach the stringer to the border with adhesive tape (Fig 15) turn over and apply PVA Wood Adhesive along the whole length of the joint, rub in and again secure with adhesive tape 
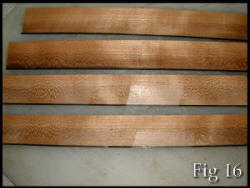
and allow to dry. (Fig 16) Continue until all four have been prepared. (Fig 17)

Before the borders and stringers are attached to the picture, glue down the back, ends and sides and allow drying.

Attach a piece of veneer tape diagonally from the corner of the picture. With a straight edge or ruler draw a pencil line from the corner of the baseboard through the corner of the picture onto the veneer tape. (Fig 18)


Fig 14 Fig 15
Fig 16 Fig 17

For the final page of this excellent tutorial on making the perfect borders and mitres, just click on the "Go to next Page" button below:

Fig 18

< Previous Page | Next Page >

Learn with Redbridge Marquetry Group Page: 1 | 2 | 3 | 4 | 5 | 6