|
|
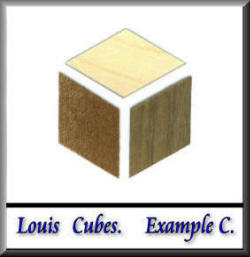
Louis cubes, as mentioned and
described above, are a clever arrangement of three
pieces of veneer which when done as Alf will describe to
you, will give you a surprisingly effective 3-D illusion
that you can use for furniture or picture frame
decoration.
The Louis cubes are very
effective when used for decorating small boxes. I have
also seen a superb use made of Louis cubes in decorating
the covers of a large book, and also a "treasure chest"
style of lidded container/box. The only problem with
Louis cubes is that they become so addictive that you
start using them to decorate everything in your house
that has a flat and blank surface!
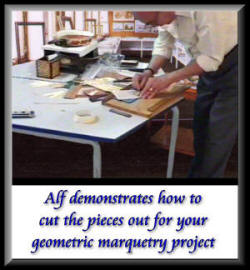
Right, well we had better let
Alf get on with his demonstration, over to you Alf:
|
|
Requirements for Louis Cubes: |
1/. |
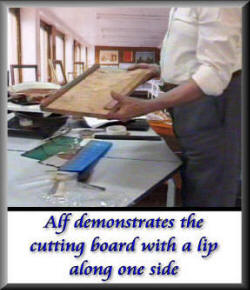
Cutting board with lip on the long side as Alf
demonstrates in the photos on the right, also a
60° angle formed with a strip of wood and
fixed to the cutting board
|
|
2/. |
Template: metal bar or block of wood (to be used
as depth guides in the same way as you did in
the chess board tutorial) |
|
3/. |
Masking tape or veneer tape |
|
4/. |
Veneers:
three contrasting veneers |
Note: When you were cutting your pieces for your chess
board you were making 90 degree cuts, for these Louis
cubes, in order to achieve the necessary diamond shapes
you will be making 60 degree cuts with the help of the
60 degree angle you will have fixed to the cutting board
in conjunction with your template blocks.span>
|
 |
|
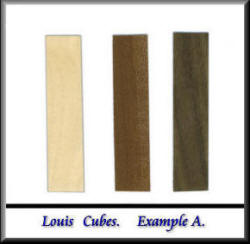
With the template in
position cut one strip approximately 7 or 8 inches in
length (178 x 204 mm) from each piece of veneer (as
shown below in example A).
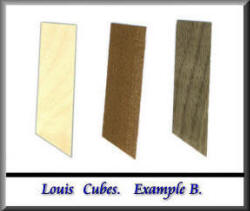
Place the piece of veneer
against the 60° angle and with the template in position
along the bottom edge then make the first cut (example
B). The first cut piece which will be a small triangle
can be thrown away. Slide the veneer down until it
touches the lip on the board and with the template in
position make the next cut so that you now have a
diamond shape, and so on to the end of the strip so that
you have a series of veneer diamonds, do exactly the
same with the other two veneers, you should now have a
number of pieces (example C). Tape the pieces together
to form the cube.
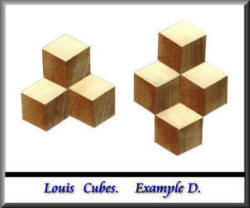
If you have assembled them
correctly your Louis cubes should look like those cubes
shown in example D. You can go on adding more cubes ad
infinitum until you have sufficient for your project.
|
 |
 |
 |
 |
| It's not too
important which veneers you choose for your Louis cubes.
The most important points are that they should be
contrasting veneers and, although this isn't too
crucial, that they should be reasonably easy cutting
veneers that don't splinter readily, otherwise you'll
have to tape the reverse side of the veneer to prevent
splitting and breaking. |
|
|
Diamond
Patterns |
These diamond
patterns
follow the same sort of cutting arrangements as you
would have used with cutting the pieces for your Louise
cubes.
The arrangement of the diamond pieces is different to
the Louise cubes in that the grain pattern is used in a
more linear fashion rather than the juxtaposition style
of the Louise cubes. The effect is more subtle with the
diamond patterns, but is very attractive none the less. |
|
Requirements for Diamond Patterns: |
1/. |
Cutting board with lip on the long side
as Alf demonstrates in the photos on the
right, also a 60° angle formed with
a strip of wood and fixed to the cutting
board
|
|
2/. |
60° Protractor |
|
3/. |
Masking tape or veneer tape |
|
4/. |
Veneers: three contrasting veneers |
|
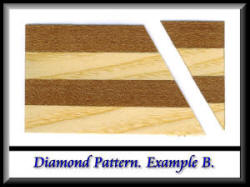
Method:
Cut with the grain 4 strips
of your selected veneer using the template, the strips
need to be 7 or 8 inches (178 x 204 mm) long.
For the second veneer, place the protractor along the
base of the veneer and mark off 60° against the grain,
cut this angle and mark off another 4 strips as above by
placing the veneer against the angle on the cutting
board and using the template.
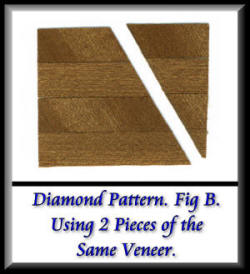
Join the strips together, once again place the
protractor along the base of the veneers and mark and
cut off (example B).
|
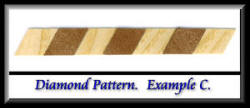
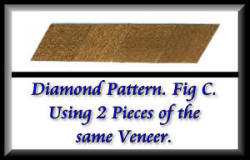
Place the angle against the angle on the cutting board,
and with the template cut a number of strips (example
C).
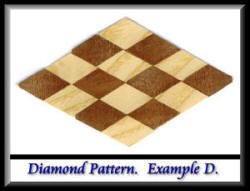
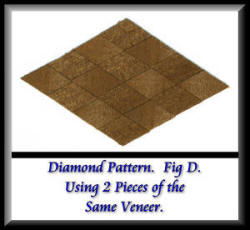
By moving each strip one place, we now have our pattern
(example D).
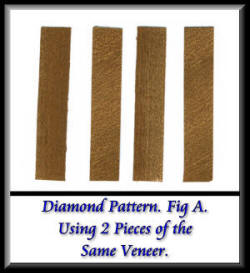
The same procedure applies with the use of 2 consecutive
veneers. |
 |
 |
 |
 |
 |
|
 |
 |
|
Well we hope you have
found these geometric tutorials and demonstrations of
Alf's interesting and informative.
These geometric designs make
wonderfully attractive decoration for the borders of
marquetry pictures, or indeed, any pictures. Boxes in
particular, and most furniture, look extremely nice when
decorated with any of these designs, although in many
cases it is often better to limit the amount you apply
of these designs, it is often better to err on the side
of the subtle rather than the too obvious.
Alf will be back with further
demonstrations in future updates to this web site. In
particular Alf has an excellent demonstration on the use
of the piercing saw currently in preparation. You will
certainly not want to miss that tutorial.
Thanks for the tutorials and
demonstrations you have been doing for us Alf, it's very
much appreciated by us all.
|
 |
|
|