|
Chess Board Tutorial by Alf Murtell |
|
|
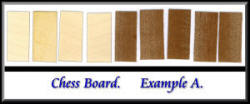
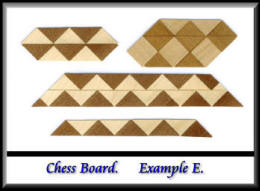
A chess board is something virtually everyone is familiar with, it is a design that has been around for centuries. Chess, I believe started it's existence on the Asian continent many hundreds of years ago and the design of the board seems to have been with us for at least a couple of thousand years. At first look it may seem to be almost impossible to be able to achieve a consistent and uniform series of squares that will fit together to make a perfectly geometric chess board, but when you follow the instructions I am about to give you, you will see how easy it really is, so let's start with the items and materials you will require in order to make your chess board: Using the templates which will be used to decide the size of your squares, place these against the lip of the cutting board, place the veneer in position in between the templates and place your steel ruler on top of the veneer and butt it up to the templates, and by using the ruler as your guide, cut four pieces from one veneer and five from the other (example A) the length of each piece will be decided on the size of the squares. |
|||
|
If you are having one inch (approx 25 mm) squares you will need a minimum of nine inches (229 mm) of veneer to allow for wastage. |
||||
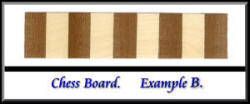
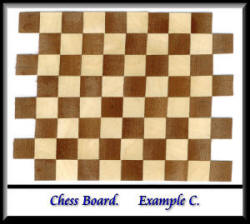
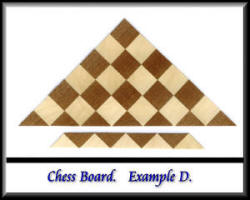
| Join the strips together with gummed tape as in example B. With the set square, square the short edge and place this strip against the lip of the base board. Using the same template arrangement as in the guide notes above, cut eight strips (care is needed here as you are cutting against the grain). Place each strip in position by moving every other strip one square forward. Tape together as in example C. Now trim off the surplus square. You will note that the accuracy of this procedure is very dependent on using the "templates" to ensure the uniformity of the squares, if the squares are not accurate the design will not work. |
 |
|||
|
 |
|||
 |
 |
|||
|
||||
|
||||
|
At some time or other, virtually every marquetarian will find the need to incorporate very thin lines of contrasting colour into a piece of their work. Examples being things like hair in portraits or rigging in the old sailing ships of yore, I’m pretty sure you can think of a few more yourselves, anyway, the method I’m going to describe to you is the one taught to me by that very famous and sadly missed marquetarian, the late Eric Horne. To start from first principles, obviously the first thing you require is the thinly shaved "line" of veneer to use for the fine line. This is achieved by shaving a thin "line" from the side of a piece of veneer with a small plane. The thickness of the final line will be dependent upon the setting of the blade of the plane so do bear that in mind when setting your plane up. My plane is a small model making item about 2.5" long and the cutting blade I’m using is actually a razor blade, I wouldn’t recommend using the standard steel blade that comes with normal planes as these blades tend to break the veneer rather than cutting it like a razor blade does, after all, you want a nice clean cut line rather than a jaggedly cut line which couldn’t be guaranteed to do the job required of it. The next priority is to try to ensure
that you use a straight grained veneer for your fine line’s as
these will form the preliminary "watch springs" of veneer
without breaking into splinters and dust. |
||||
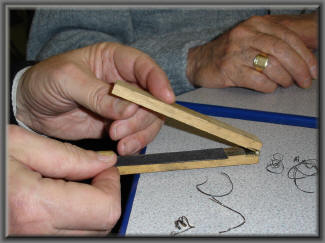 Peter demonstrates how to place a piece of veneer in the clamp |
||||
|
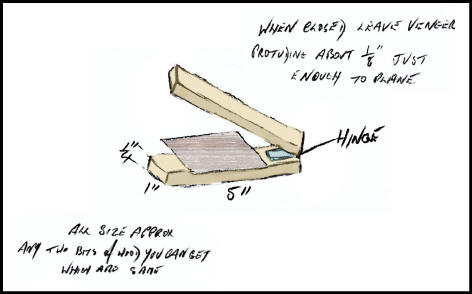
Now an important tip when setting up your piece of veneer to
shave the fine lines from is to wet the veneer first before
proceeding on to the next step. Once your veneer is damp place
it between two parallel lengths of wood as shown in the diagram.
This clamping arrangement has a small hinge at one end, thus
making it an easier proposition for holding the veneer in place
for when you want to "run" your plane along it to cut your fine
lines from the piece of veneer. You can, of course, place this
clamping arrangement as described above, in a vice of some sort
(a small model makers one would be ideal) and in doing so thus
protect your delicate marquetarians fingers from being
inadvertently shaved whilst performing the fine line cutting
operation. As I said earlier, if your veneer is wet then the
lines you’ve just cut out will uncurl a lot easier when you come
to flatten them out before leaving them to dry. |
||||
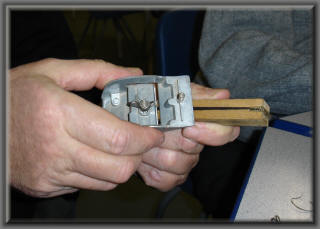 Peter shows you how to "shave" a curl from a piece of veneer in the clamp |
||||
|
When dry, with some grades of veneer, I go over them with some 240 grade of glass-paper just to smooth off any remaining roughness. So now, to cutting the insert line in your picture for where you are going to want to place your fine line. Make the cut in the same way as you would normally do for the majority of your marquetry work, but this time run your blade back along the same cut with a slight angle on both sides of the cut, so that in effect you make a wider sort of "V" cut on the line you previously cut. This procedure gets somewhat easier with a little practise just try to make sure that you try to follow your original cut as accurately as possible. Obviously the better that you can follow the original cut with your blade held at an angle, the better your finished line will be. And so to the tricky bit, I normally use
a pair of tweezers to insert the "line" into the cut. Again this
also gets easier with practise. When you have succeeded in
placing your line in the vacant cut, don’t drop your glue
directly on the cut because this could quite easily "wipe out"
your newly inserted line from within it’s nice new home in your
carefully constructed marquetry picture and then all your hard
work will have been for nothing. The secret to resolving this
problem is another of the little tips that Eric Horne gave me,
and that is to apply glue to just one side of the cut and then
with your finger gently "roll" the glue along the cut. |
||||
 |
||||
|
If you are having any problems in locating a supplier of miniature block planes, Peter suggests that you may like to try the following company who stock an excellent model at a reasonable price: Keycut Services Ltd, |
||||
| Tutorials Menu | ||||

