|
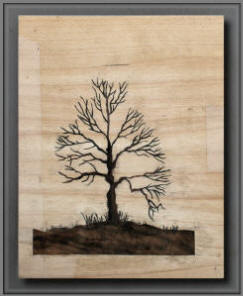
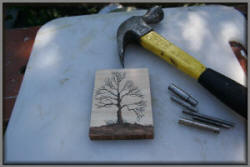
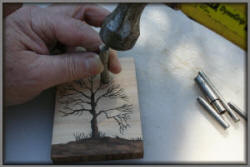
This hammer work cannot be carried
out on an unmounted picture which would split when struck with
hammer and punch. So I have mounted the finished tree on a piece
of MDF. It is now stable and is ready for the next stage.
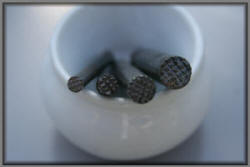
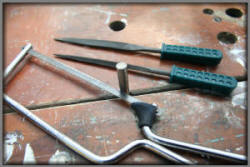
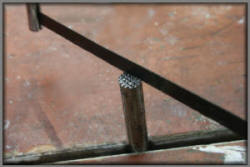
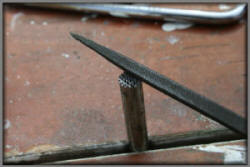
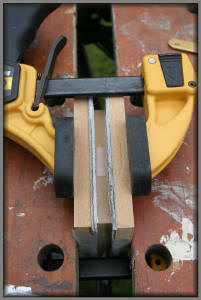
A serrated punch has to be made. This is
easily done. Take a 6” nail and cut the point off. Secure it in
a vice with the flat face uppermost. Take a small hacksaw with
sharp blade and cut three cuts across the face of the nail to
about one millimetre depth. Turn the nail 90o and repeat the
process. The face of the nail should have a crisscross pattern.
I use a triangular file and a thin one to file along the cuts to
make sharper points. The punch is now ready for use. Nails of
differing thicknesses can be used and can be useful additions to
your tool box.
At this stage, if you have not used this
technique before it is advisable to practice on piece of ply
wood as you don’t want to spoil months of work by inexperience
punch work.
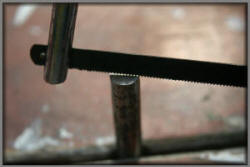
When using the punch you must hold it
upright otherwise the indentations will be of unequal depth.
Strike the nail firmly. Aim to go
through the picture into the base board. In my picture I started
‘punching’ in the bottom right hand branches but there is no
correct place to start. Use your imagination.
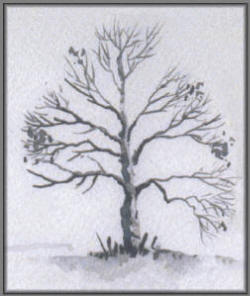
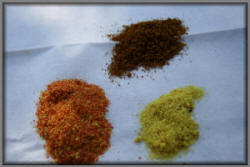
Decide what colours you want in you
picture. In my picture I wanted autumn colours – reds, yellows
and brown. In different pictures other colours may be required.
The sawdust should be quite fine to be forced into the holes
left by the punch.
There are various ways to obtain the
sawdust. I select the veneer that I wish to use and cut it into
short strips and glue them together until they are the thickness
of a pencil. I then put it into an electric pencil sharpener.
The dust collected is fine enough to use. Another method I have
used is to file the strips with a wood rasp or yet again sand
with a course glass paper. If you require a coloured wood, dye
the veneer before making the ‘pencil’ you will see that I have
three basic colours which I have mixed together to obtain an
‘Autumn mix’
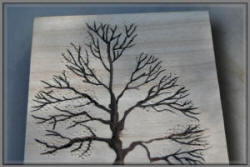
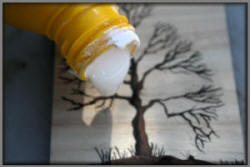
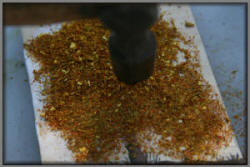
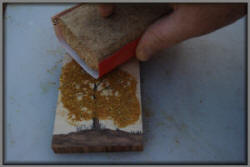
Wipe white PVA glue well into the
punched holes and quickly before the glue goes off sprinkle the
dust over them bit by bit. With the flat end of the hammer press
the dust into the holes. Place a piece of polyfilm over the
picture and press it in a press to ensure the holes are all
filled.
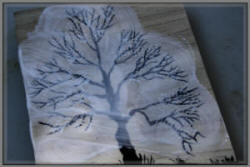
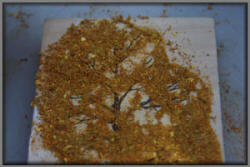
Leave for 24 hours then take out of the
press and remove the polyfilm. Now comes the hard work. Removing
all the dust except that which has been pressed into the holes.
Use a cork block and glass paper lightly. Do not tilt the block
as you risk damaging the edges of the picture. Glass paper is my
preferred method as scraping will tear the dust out of the
holes.
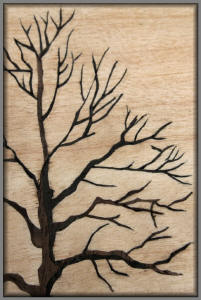
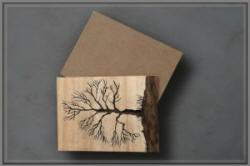
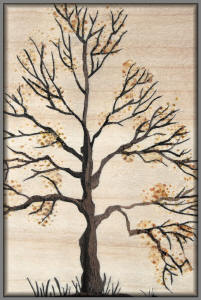
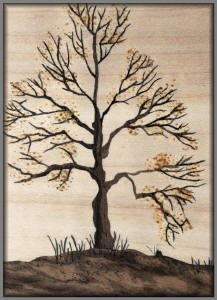
Continue sanding until all the residue
has been removed and you will see the holes now appear like
leaves. If the finished product is not to your liking or the
leaves are required to be more thickly spread repeat the
process, perhaps with a different colour over the top of the
existing ones.
Having achieved the desired effect, seal
the leaves with a sanding sealer to stop ‘bleed out’ into the
background wood and when dry finish in your usual way.
The
following photo sequence demonstrates how to make the "punches"
necessary
for doing this technique - and the procedure for applying the
veneer dust.
|