|
|
| |
|
Firstly, we
will take a look at Basket Weave, this is
actually quite simple to do once you know the
techniques. It may look intricate and terribly
delicate, but when you become familiar with the
methods we use for doing basket weave you will
be decorating boxes and things with total
confidence. Now, the first thing to check is
that you have all the bits and pieces you'll
need for doing basket weave to hand, so lets
check our list:
|
|
Requirements:
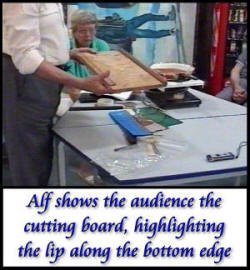
- Cutting board with a
lip along one edge
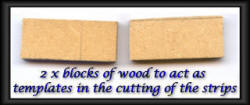
- 2 x blocks of wood
1½” x ¾” x ¼” (metric 38 x 19 x 6
mm)
- Masking tape or
veneer tape
- Stringer 1/16”
(metric 1. 5 mm)
- Sand for sand
scorching
- Sycamore veneer
|
 |
|
 |
 |
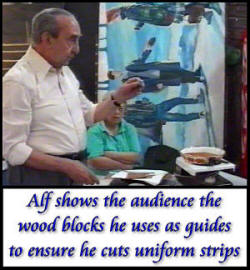
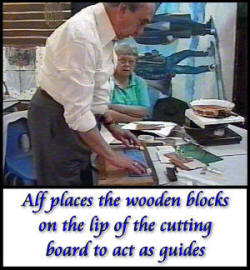
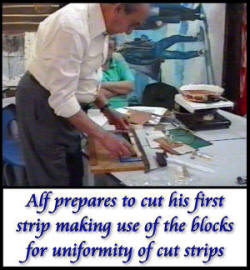
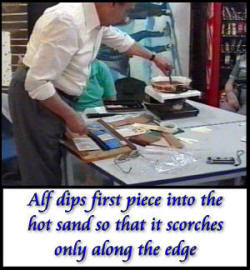
What we do now is cut out our
sycamore blanks ready for sand scorching along
their sides to provide the contoured effect we
require for the basket weave effect. This we do
by cutting strips about 4 inches in length (101
mm) by 3/4" wide (19 mm) - you set the width by
using the wood blocks as Alf shows you in this
photo below on the right below you will want to
cut about four or five pieces which you then
sand scorch along their "long sides" to give you
the contoured effect.
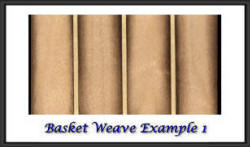
You will now need some stringers for placing
between your sand scorched pieces as in "Example
1" (stringers by the way are very thin strips of
veneer, usually a sixteenth or an eighth or a
quarter of an inch in width, that's about 1.6 or
3. 2 or 6. 3 mm) and then you glue and tape them
in position as you see in this example. The
arrangement is: one strip then one stringer,
then strip, stringer, strip, etc. |
| The next step
is to cut thin strips 1/4" (6 mm) wide
from the assembly you've now got as
shown in Example 1 above. As you will be
cutting across the grain, take care with
your cutting and make sure that you
lubricate your cutting blade by dipping
the tip of the blade in some wax so that
it cuts easily without "pulling" or
catching on the grain and breaking the
veneer instead of cleanly cutting it. |
|
|
|
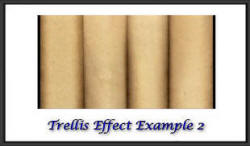
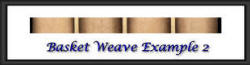
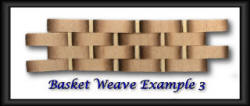
You
will now have a collection of thin
strips similar to those shown in
"Example 2". Your next step is to
arrange them by moving every second
strip one half of a single vertical
section to the left so that you end up
with an arrangement as you will see in
"Example 3" on the right >> then
glue and tape them into position. |
|
 |
|
|
Trellis Work |
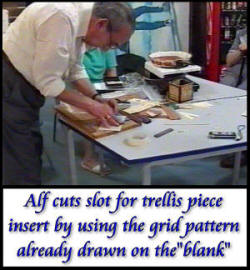
Well here we are at Trellis work. You're first
step is to decide what background veneer you
wish to use, this is the veneer that will show
through the trellis work, so you will want one
that complements your trellis effect. The most
important consideration will be the initial
marking out of your background veneer. Alf
suggests that you can either tape over the
background veneer so that you can mark out on
the tape, or you can use a white "leaded" pencil
to mark out directly onto the veneer
|
|
Trellis Work Materials
Requirements:
- Cutting board with a lip
along one edge
-
2
x blocks of wood 1½” x ¾” x ¼”
(metric 38 x 19 x 6 mm)
- Masking tape or veneer
tape
- Sand for sand scorching
-
Veneer: Sycamore, Mahogany or Walnut
|
|
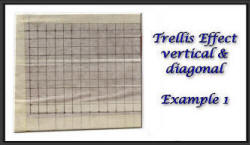
The
above illustration shows the
background veneer after it has
been taped over and marked out
with a 1/4" grid (6 mm). It is
essential to accurately mark out
the grid to ensure a uniform
trellis pattern.
|
|
|
 |
 |
|
As with Basket weave,
Alf cuts some more strips of sycamore and
scorches them along their "long sides", but this
time Alf doesn't use any stringers. Alf joins
them together as you will see in Example 2, Alf
then cuts them into strips (as you will see in
Example 3) by using the methods shown in the
above left hand photo so that he ends up with
several quarter inch (6 mm) thick strips to
build his pattern from.
|
|
|
|
An important difference here
from the basket weave tutorial
is that you don't glue the
strips together, because you
will want to insert each 1/4" x
3/4" (19 x 6 mm) piece into the
slots you cut in the background
veneer. To illustrate this point
take a look at "Example 4" on
the right of this text >>
This example of trellis work
is shown in the vertical layout.
The shorter ends you see in
this example are only 1/4" x
3/4" pieces cut in half. The
dark bits you see between the
"pieces" are the background
veneer with the covering tape
peeled away.
After the individual pieces
have been inserted into the
background veneer they are then
held in position with a smear of
white PVA glue rubbed into the
cuts.
|
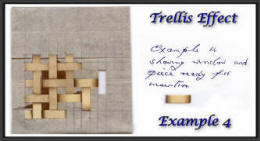
"Example 4" showing window
and piece
ready for insertion. |
| |
|
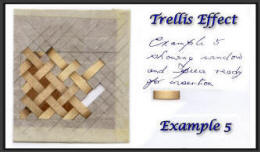
"Example 5" above shows
trellis work set out in a
diagonal layout.
Again, the
dark area's between the "trellis
strips" are the background
veneer with the covering tape
peeled off.
|
 |
|
|
|
|
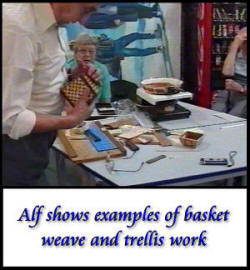
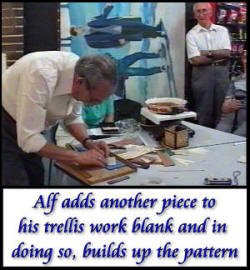
Well, there we
have Alf's lecture on Trellis work. As
you can see on the example Alf is
showing the audience in the above photo,
the trellis work makes a wonderful
decoration for a small box. We hope you
are finding Alf's lectures are helping
you with your marquetry. Alf will be
back with some more demonstrations and
lectures over the next few months, so
that is something you should find will
be well worth looking forward to.
|
|